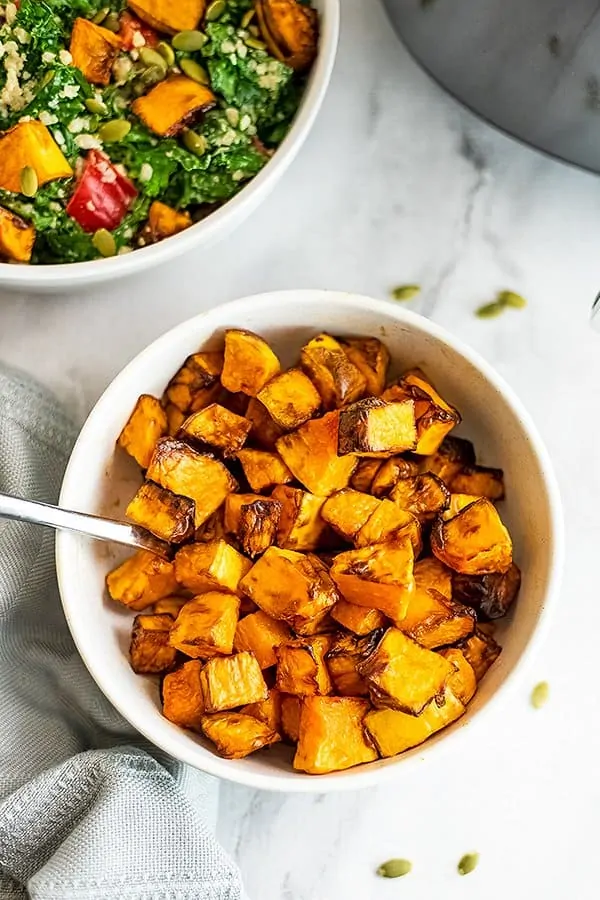
Air Fryer Butternut Squash

If you’ve been wondering how to make air fryer butternut squash cubes that are tender on the inside and caramelized on the outside, you’re in the right place. This recipe is quick, simple, and cooks in about half the time it takes in the oven. With just 2 ingredients and 16 minutes, you’ll have perfectly roasted butternut squash in the air fryer, ideal for a fall side dish, grain bowl, or hearty salad.
I’ve been making butternut squash for years, and once I discovered how fast and reliable the air fryer method is, it completely changed my routine. As a recipe developer who creates quick and nourishing meals for busy weeknights, I rely on this method whenever I want squash ready in under 20 minutes. It’s foolproof, flavorful, and one of the easiest ways to enjoy a classic fall vegetable.
If you love making quick and easy fall veggie side dishes in the air fryer, you’ve got to try my air fryer delicata squash, air fryer spaghetti squash and air fryer frozen brussel sprouts next.
Ingredients
- Butternut squash (peeled, cubed or cut into fries)
- Olive oil or avocado oil spray
- Salt (optional)
How to make butternut squash in the air fryer

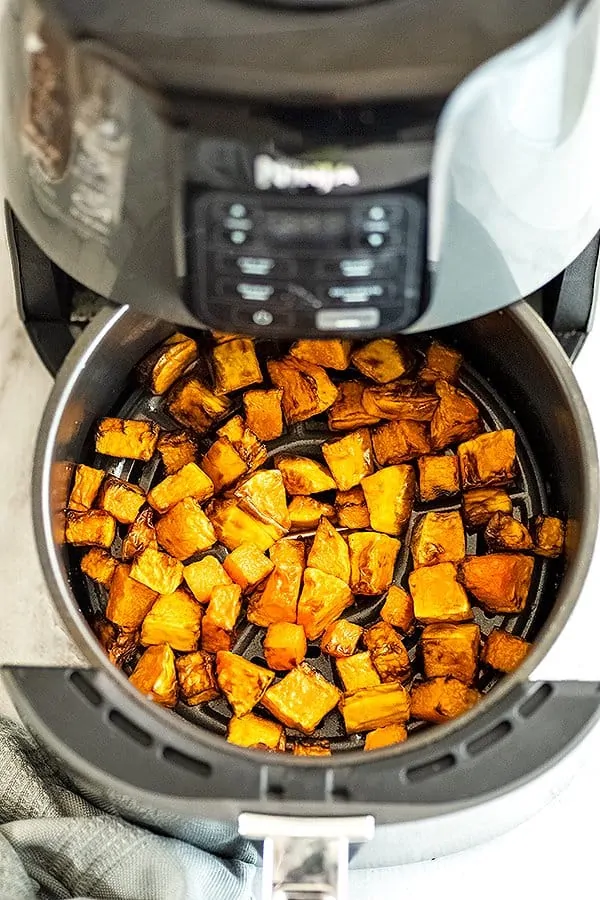
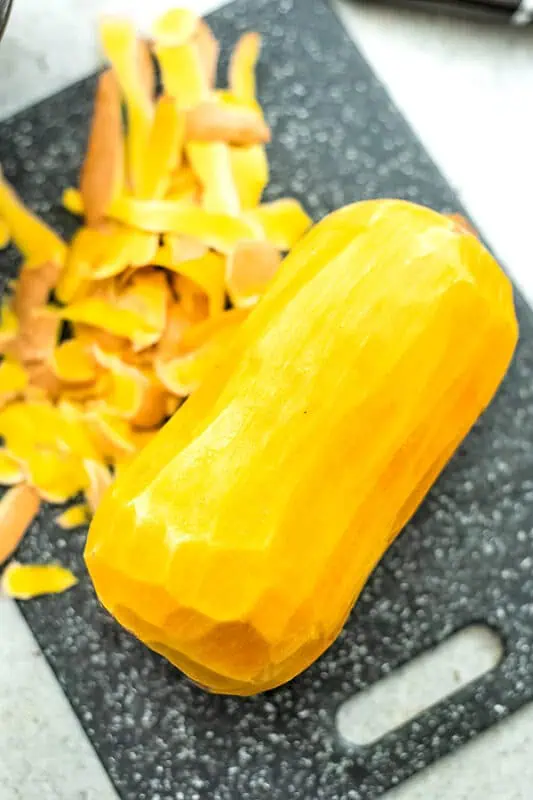
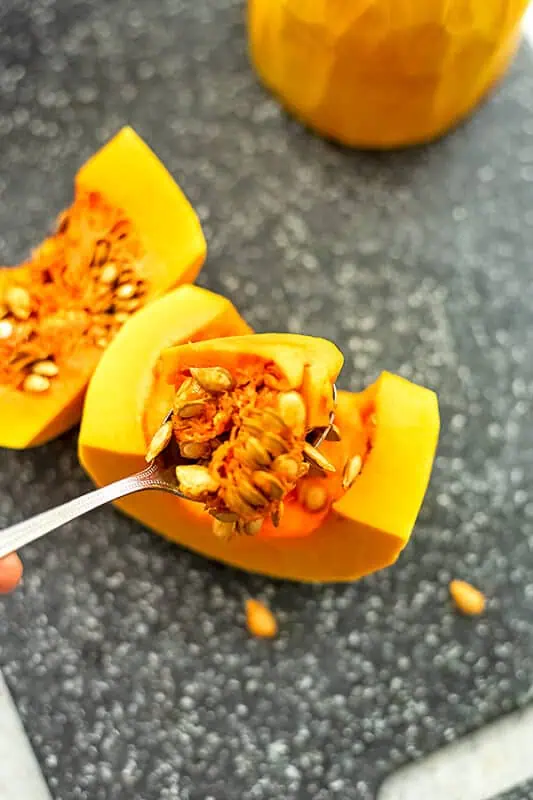
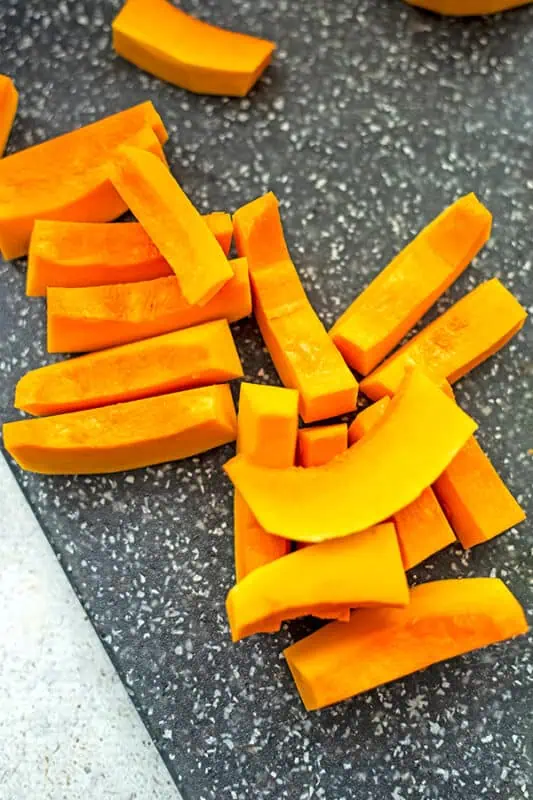
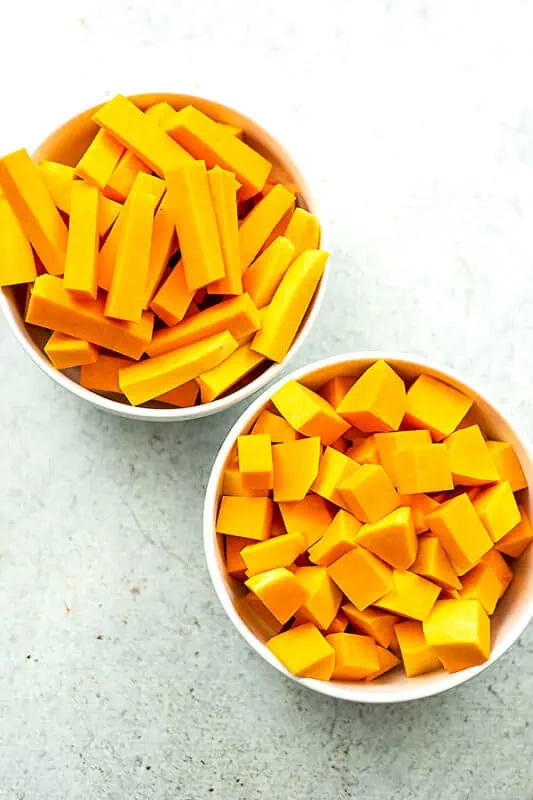
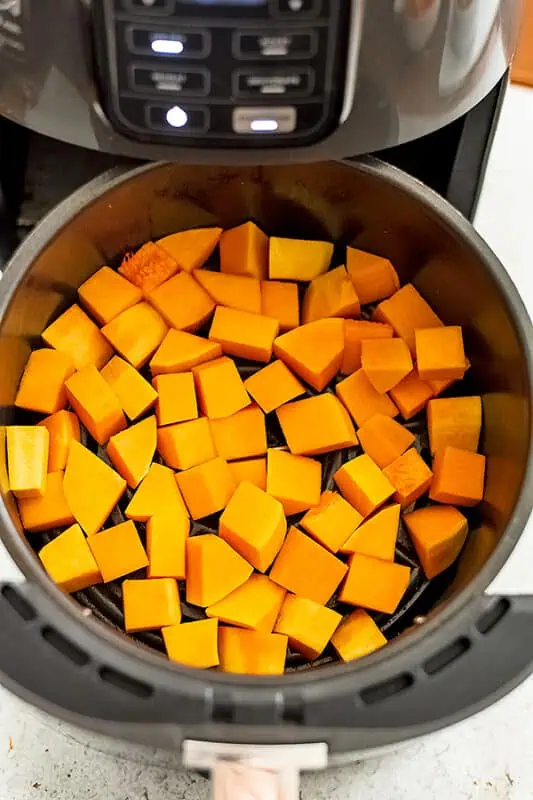
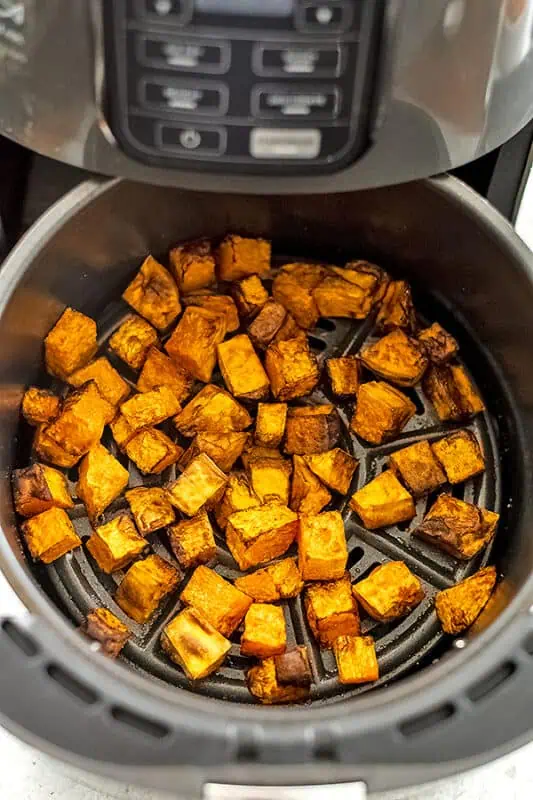
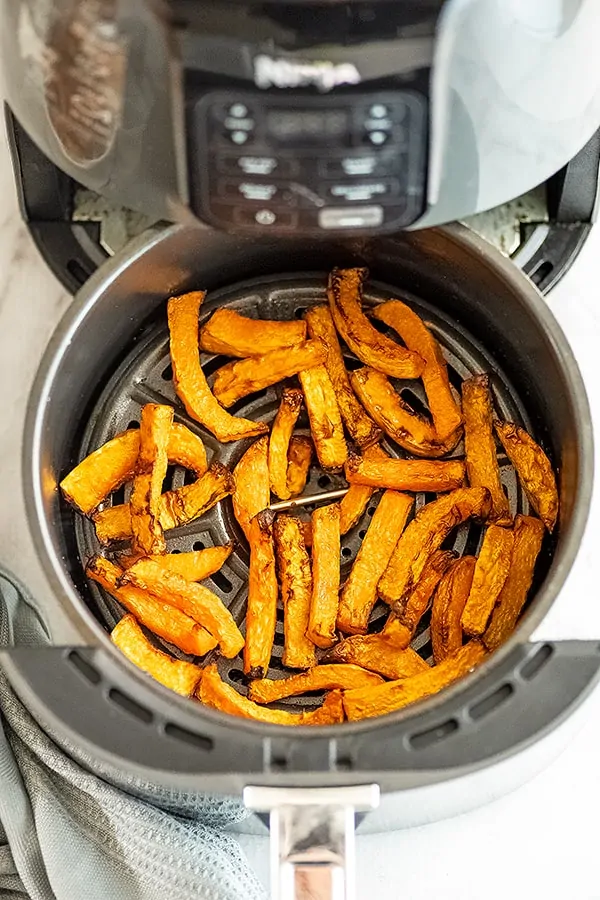
Start by peeling the butternut squash (the skin is tough). Cut the top and bottom off the squash. Cut the squash at the bulbous point to get to the seeds. Cut that in half and spoon out the seeds. Cut the squash down into 1 inch thick pieces. Keep the pieces long for butternut squash fries, or cut into 1 inch cubes. Add butternut squash to the air fryer. Cook at 375F for 16 minutes. After cooking for 8 minutes, pause the air fryer and shake the basket. Spray with avocado oil and sprinkle with salt. Cook again, pausing at 4 minutes to shake the basket a second time.
Tips for success
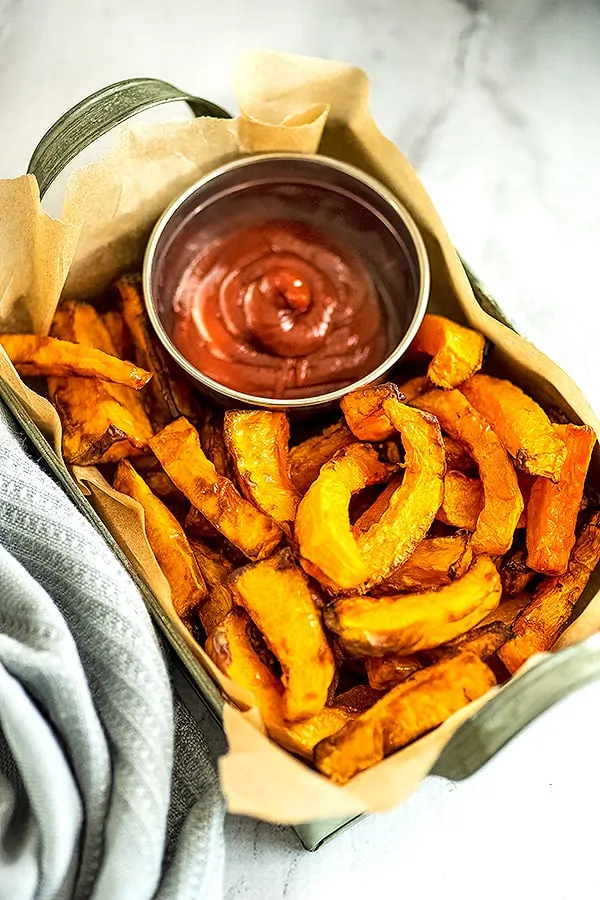
- Enjoy immediately for the best texture– Butternut squash is crispiest right out of the air fryer, softening as it sits.
- Line for easy cleanup – Use parchment paper or a silicone liner to prevent sticking.
- Watch for skin sensitivity – Some people react to raw squash; wear gloves if you notice irritation.
- Time saver: use store-bought cubes – Trim them down to even sizes if needed for consistent cooking.
- Frozen cubes work too – The texture isn’t as firm as fresh, but it’s a great freezer-friendly option.
- Prep ahead – Cube raw squash up to 3 days before cooking and store in the fridge until ready.
Easy Air Fryer Butternut Squash
Ingredients
- 1 large butternut squash
- Olive oil or avocado oil spray
- 1/2 tsp salt - optional
Instructions
- Peel the butternut squash and cut it into cubes or fries (depending on what you prefer).1 large butternut squash
- Spray the basket of your air fryer with olive oil spray and add the butternut squash cubes or fries. Be careful not to overcrowd the basket, you only want one single layer.Olive oil or avocado oil spray
- Cook at 375F for 16 minutes.
- After 8 minutes of cooking, shake the air fryer basket to move around the squash. Spray the squash with olive oil spray and add optional salt. Shake again. Continue to cook the butternut squash.1/2 tsp salt , Olive oil or avocado oil spray
- With just 4 minutes left, shake the basket again (so nothing burns).
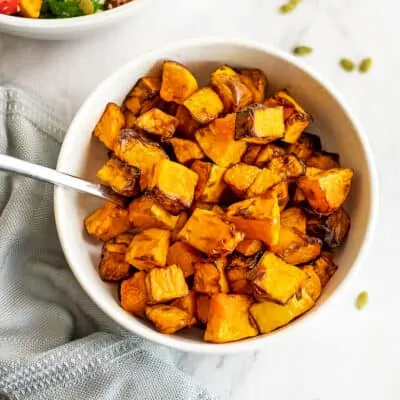
- Enjoy the butternut squash immediately for best texture.
Equipment
Recipe Notes
- Cut into even cubes – Uniform sizes (whether store-bought or homemade) help everything cook at the same rate.
- Don’t overcrowd the basket – Keep the squash in a single layer so it cooks evenly and caramelizes.
- Shake the basket regularly – Especially toward the end to prevent burning and ensure golden edges.
- Season before cooking – If adding a seasoning other than salt, toss with oil and spices so every cube gets coated for maximum flavor.
- Fridge: These are best right out of the air fryer, but you can also store leftovers in the fridge for up to 3 days.
- Reheat in the toaster oven or in the air fryer, at 350F for 4-5 minutes to warm up and crisp up the skin.
- Freezer: Freeze up to 3 months. Use in soups as the texture will change when defrosted.
Nutrition Information
Flavor variations
You can keep it simple with salt and pepper, or change it up with sweet or savory seasonings. To add spices, place the squash cubes in a large bowl, drizzle with 1–2 tablespoons of olive oil or avocado oil, then sprinkle on your favorite seasonings.
Sweet Options
- Cinnamon
- Nutmeg
- Chinese 5-Spice Powder
Savory Options
- Chili powder
- Cumin
- Garam masala
- Curry seasoning
- Red pepper flakes
- Garlic powder
💡 My favorite combination is a sprinkle of garam masala and curry seasoning for grain bowls, or a dash of cinnamon for a sweeter side dish.
How to serve
This simple side dish is incredibly versatile! Here are some of my favorite ways to serve it:
As a Side Dish or Snack
- Pair with any protein for an easy weeknight meal
- Serve as a fun snack or appetizer with dips like ketchup, arugula pesto, vegan chipotle mayo, or cilantro chimichurri
On Salads and Bowls
- Toss on top of fall-inspired salads with maple tahini dressing
- Add to grain bowls with quinoa or yellow rice and roasted veggies
- Mix into taco bowls (try it with spicy tahini sauce!)
- Serve over rice with chickpeas and curry seasoning
For Sweet Dishes
- Sprinkle with cinnamon or nutmeg and add to yogurt bowls with gluten free granola
Common questions
Do I have to peel butternut squash?
Yes, I suggest peeling the squash before cooking it, as the skin does not have good texture when cooked and it’s difficult to remove once cooked.