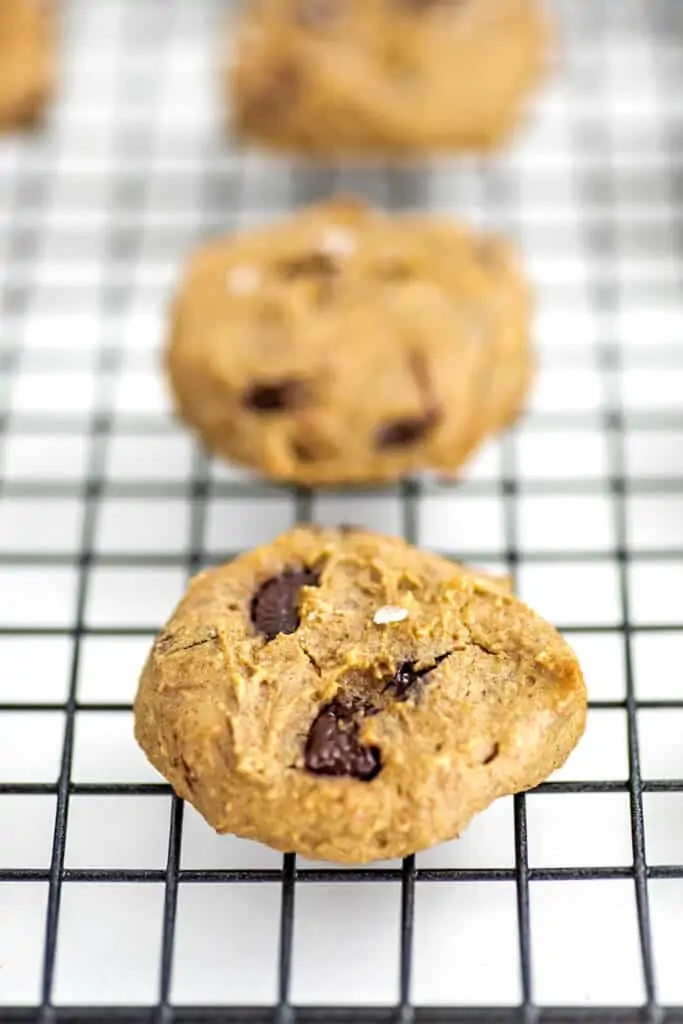
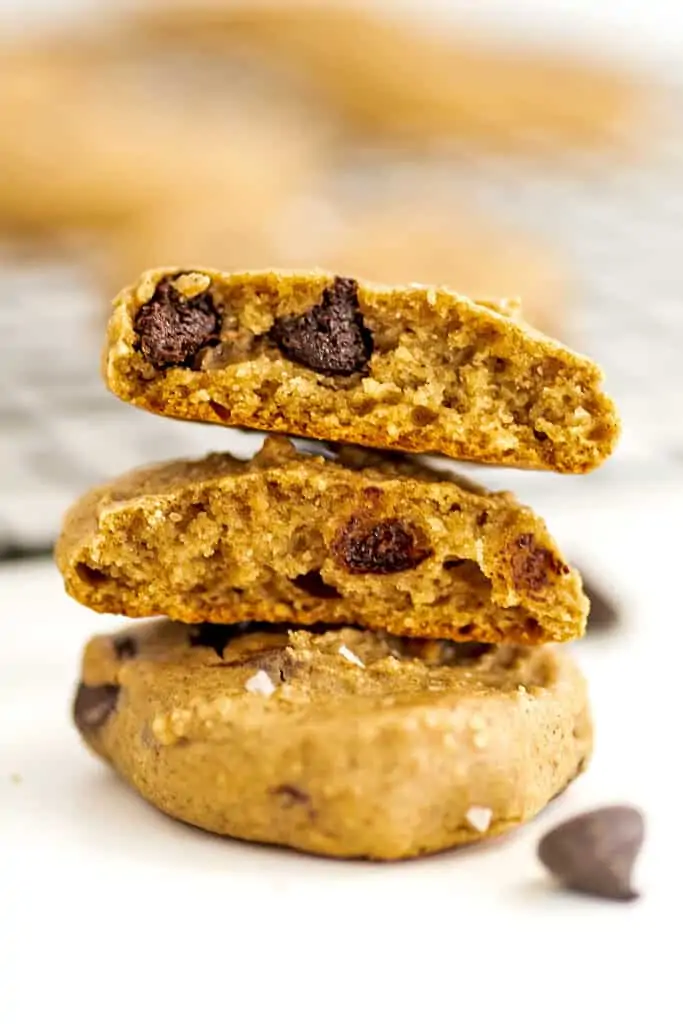
Chickpea Peanut Butter Cookies

Chickpea peanut butter cookies are such a fun and delicious treat! Made in the food processor in just 5 minutes, these cookies bake up in 15 minutes and are so easy to make! You won’t believe that these cookies are made from chickpeas! Naturally sweetened, vegan, gluten free and egg free!
Why you will love this recipe
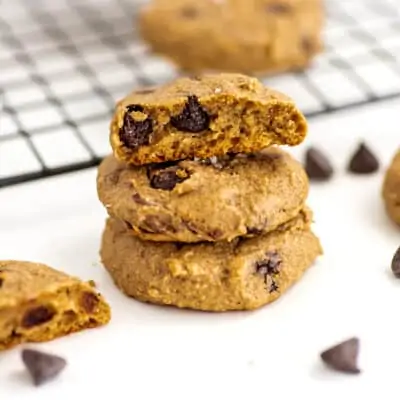
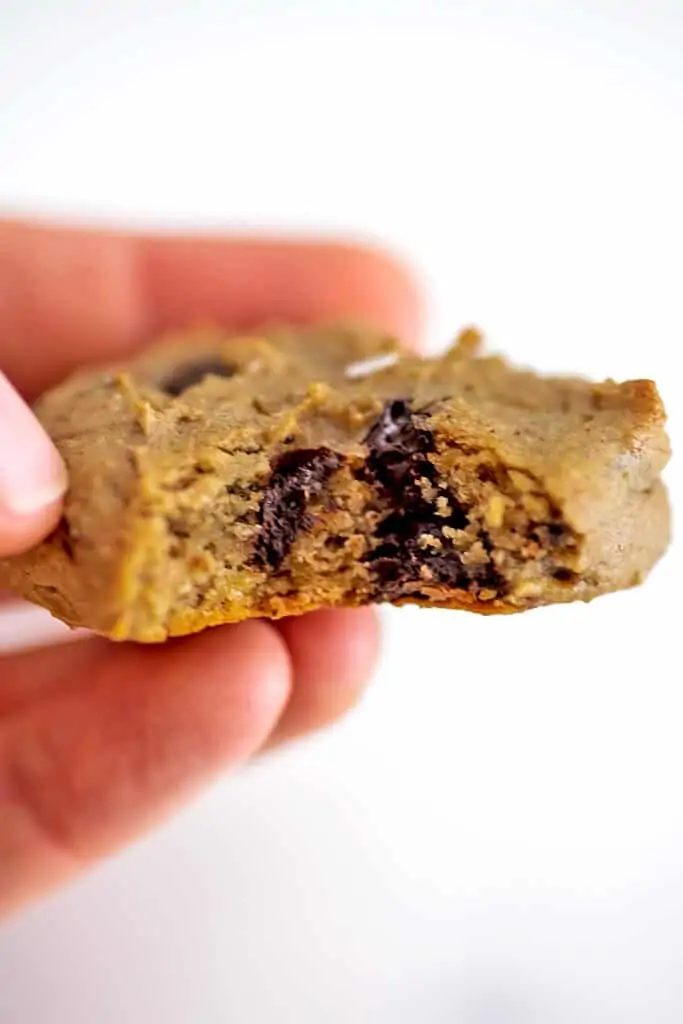
- Who doesn’t love a good peanut butter and chocolate chip cookie! While these cookies don’t taste like traditional peanut butter cookies, they are still incredibly delicious and actually taste like cookie dough when eaten cold out of the fridge!
- Great way to get in more fiber and protein! If you have picky eaters (or are a picky eater yourself), these peanut butter chickpea cookies are a great way to get in more legumes! I promise you don’t even taste them once they are all baked up!
- Easy dessert or afternoon snack! These vegan chickpea cookies are naturally sweetened and made with pantry ingredients that you can feel good about!
- Soft, chewy cookies that are even better the next day. These cookies are great warm or at room temperature but turn into heaven when stored in the fridge overnight. They taste like chocolate chip cookie dough in cookie form!
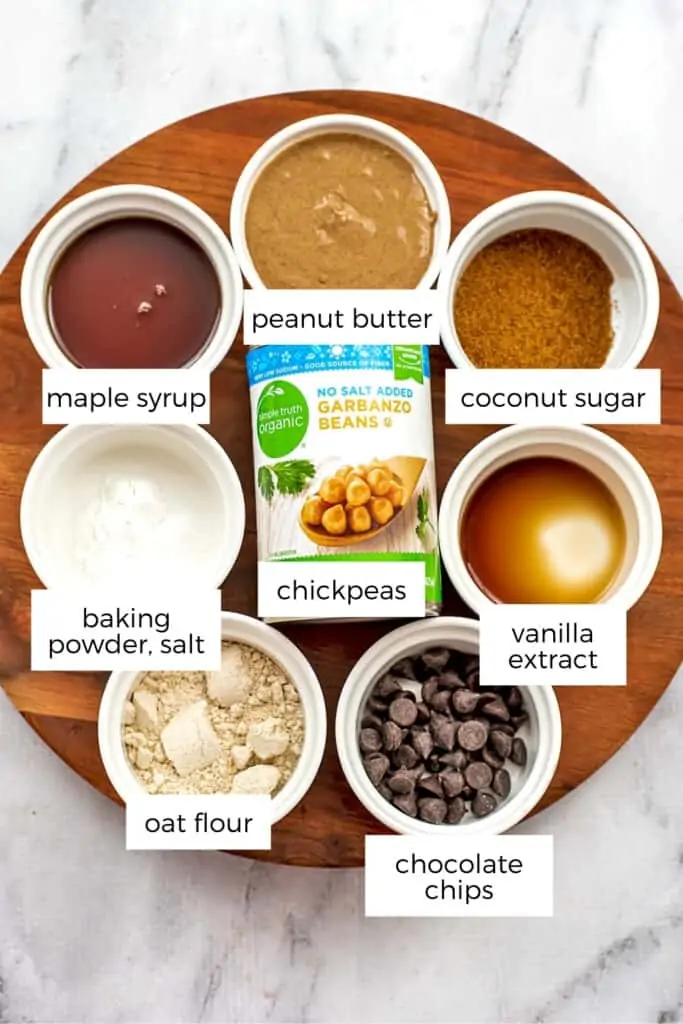
Ingredient spotlight
- Chickpeas – I use canned chickpeas for ease but you can certainly use chickpeas you have cooked from dry. The chickpeas replace most of the flour in typical cookie recipes.
- Peanut butter – be sure to use natural peanut butter with the only ingredients are peanuts (or peanuts and salt). If there are added oils, the cookies won’t turn out.
- Maple syrup – the maple syrup helps to add the necessary liquid while also helping to sweeten the cookies.
- Coconut sugar – the cookies were just not sweet enough with just maple syrup. Add 2-3 tablespoons of coconut sugar helps to get the cookies sweeter without adding any additional liquid. You can also use 3-4 soaked dates in place of the coconut sugar.
- Oat flour – you can make your own oat flour or use almond flour if you cannot tolerate oats. The oat flour helps to give the cookies structure. When I didn’t include the oat flour, the cookies tended to crumble and fall apart easily.
How to make chickpea peanut butter cookies
Preheat the oven to 350F.
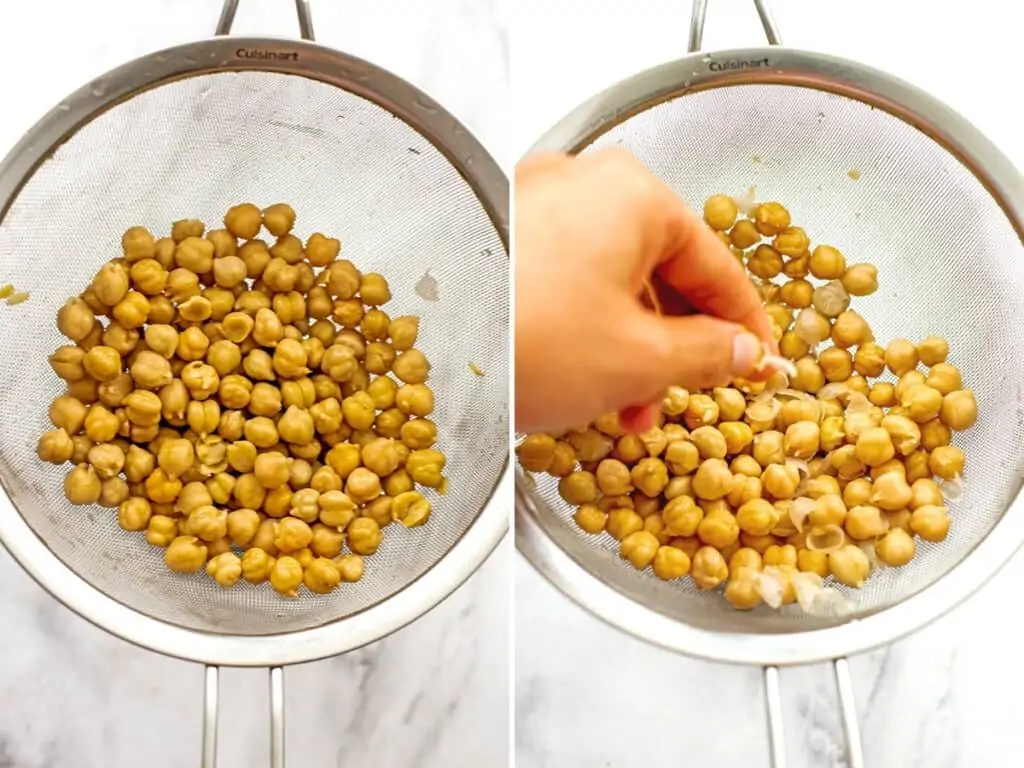
Start by rinsing and draining the chickpeas. I like to run my hands over the chickpeas while they are in the mesh strainer. This helps to rub off some of the skins from the chickpeas. Remove any of the loose skin from the chickpeas before adding them to the food processor.
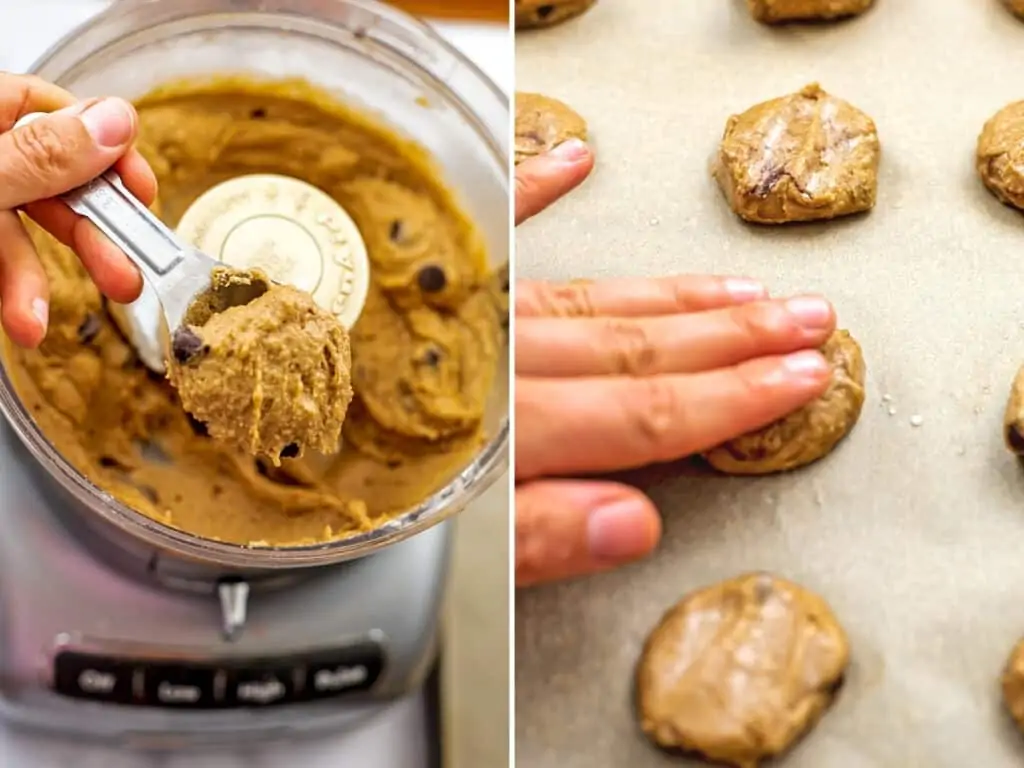
Add the rinsed and drained chickpeas, peanut butter, maple syrup, coconut sugar and vanilla extract to the food processor. Process on high for 1-2 minutes, scraping down the sides as needed.
Once the mixture is smooth and it doesn’t appear that there are any more pieces of chickpea in the batter, add the oat flour and baking powder. Process on high for about 1 minute, scraping down the sides as needed to ensure all the flour is incorporated.
Next add the chocolate chips. I like to use the pulse button to pulse the mixture to incorporate these easily. Note: the batter can be warm from running the food processor for a few minutes to break down the chickpeas. If you don’t want the chocolate chips to melt, give the batter a few minutes to cool before adding them.

Line a baking sheet with parchment paper.
Using a tablespoon to scoop the batter from the food processor. It’s best to use a small silicone spatula to get the batter from the spoon onto the parchment. Note: the batter will stick to parchment so don’t try to move it around once it’s down.
This batter does not change shape much once baked, so take a moment to form the cookies. I like to press in the sides to make circles and press down on the top so they are flat. The batter is very sticky and will stick to your hands, so wetting your hands slightly before touching the dough is best for this step.
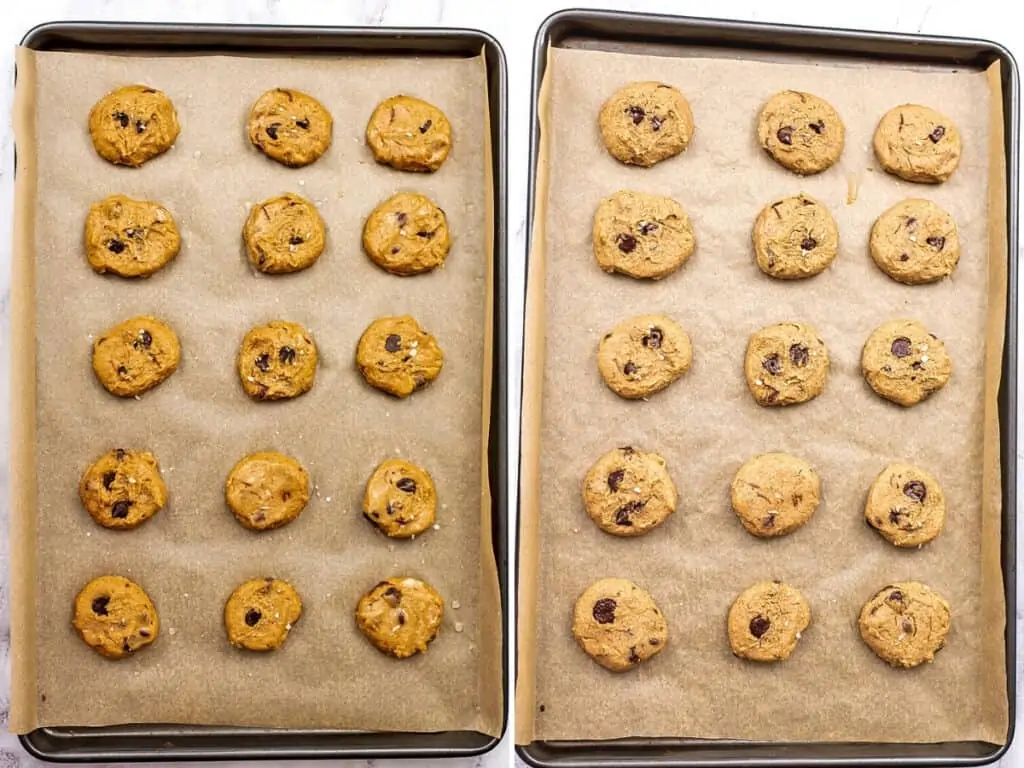
Once the cookies have been scooped and shaped, bake them in a 350F oven for 15 minutes.
After 15 minutes, remove them from the oven and allow to cool for 10 minutes to set.
Enjoy warm or allow cookies to cool to room temperature before transferring them to the fridge. Store in the fridge up to 5 days. They are even better the next day once they are cold.
Top tips
- These cookies don’t spread or rise much, so be sure to shape/flatten them with wet hands to ensure they cook through and have a good shape after cooking.
- The chickpea batter is extremely sticky! To work with the batter, wet your hands slightly. It’s ok if the cookies look a little wet after you shape them, it will easily evaporate off during baking!
- The dough is hot from blending in the food processor. If you don’t want your chocolate chips to melt, let it sit for 5 minutes before adding the chocolate chips.
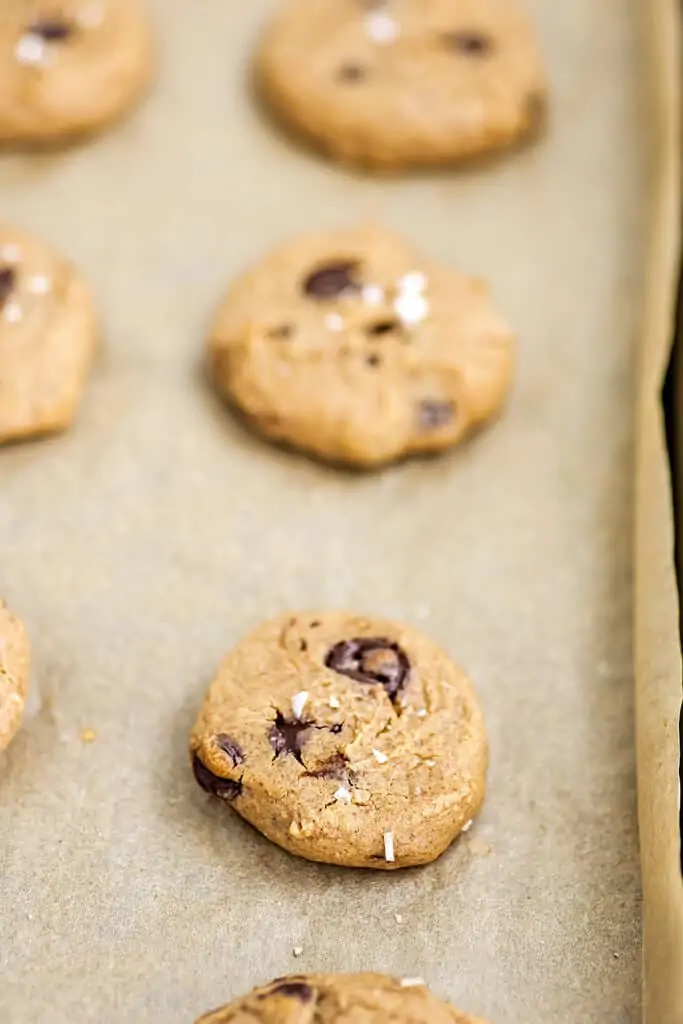
- If you want to intensify the flavor of the cookies, sprinkle them with flaky salt! The salt helps to elevate the flavors and adds a nice crunch to the cookies.
- If you love really sweet cookies, increase the coconut sugar to ¼ cup.
- Chickpeas can sometimes be tough to digest. I find that taking a few extra minutes to remove the skins from most of the chickpeas makes these cookies much easier to digest. The easiest way to remove the skins is to roll the chickpeas around in a mesh strainer under water. The friction helps to remove the skins. Simply pick the skins out of the chickpeas before adding them to the food processor.
- Don’t be concerned if you don’t love the taste of the dough – baking the cookies makes them even sweeter and gives them a much better flavor!
Chickpea Peanut Butter Cookies
Ingredients
- 1.5 cup chickpeas (from 1 15 oz. can), rinsed and drained
- 1/2 cup peanut butter (natural peanut butter only where ingredients are peanuts or peanuts and salt)
- 1/3 cup maple syrup
- 2-3 tbsp coconut sugar
- 1 tsp vanilla extract (optional)
- 1 tsp baking powder
- 3 tbsp oat flour
- 1/8 tsp sea salt
- 1/4 cup dairy free chocolate chips
Instructions
- Preheat oven to 350F.
- Rinse and drain the chickpeas. Rub the chickpeas together in colander and remove any skin that comes off the chickpeas.1.5 cup chickpeas (from 1 15 oz. can), rinsed and drained
- Add chickpeas, peanut butter, maple syrup and coconut sugar to food processor.1.5 cup chickpeas (from 1 15 oz. can), rinsed and drained, 1/2 cup peanut butter (natural peanut butter only where ingredients are peanuts or peanuts and salt), 1/3 cup maple syrup, 2-3 tbsp coconut sugar
- Process on high until smooth, 1-2 minutes.
- Add the baking powder, oat flour and salt. Process again 30 seconds – 1 minute until well combined (you may need to pause and scrape down the sides).1 tsp vanilla extract (optional), 1 tsp baking powder, 3 tbsp oat flour, 1/8 tsp sea salt
- Add chocolate chips, pulse to combine.1/4 cup dairy free chocolate chips
- Place parchment paper on baking sheet.
- Spoon out batter 1 tablespoon at a time (use a small spatula or another spoon to help remove the batter from the tablespoon as it's sticky).
- Once cookies have been scooped out onto baking sheet, wet hands and shape cookies. You may need to wet you hand a few times during this process. Shape into circles and press down so they are flat.
- After all cookies have been shaped, place cookies in 350F oven for 15 minutes.
- After 15 minutes, remove the cookies and allow them to cool at least 10 minutes before enjoying.
Equipment
Recipe Notes
- Fridge: Allow the cookies to cool and come to room temperature before transferring them to a airtight container. Store in the fridge for up to 5 days.
- Freezer: Allow the cookies to cool and come to room temperature. Place a piece of parchment or wax paper over a baking sheet and add the cookies in a single layer. Once frozen, remove from the baking sheet and transfer to a freezer safe bag or container. Freeze for up to 3 months. To defrost just leave out on the counter for a few minutes.
Nutrition Information
Common questions
Can you use a blender to make these cookies?
No, the batter is too thick and can burn out the motor in your blender. I would only recommend using a food processor to make these cookies.
Can you make these cookies with any other kind of bean?
You can substitute the chickpeas for cooked black beans, white beans or even lentils.
Can you make these peanut free and school safe?
Yes! You can use almond butter or keep them nut free with sunflower seed butter or tahini.
Note that sunflower seed butter can sometimes react with baking powder and turn the cookies green on the inside after baking as a reaction with the baking soda in baking powder. Typically this won’t happen unless you add baking soda to the mix but it’s worth noting in case you have this experience.
Can you make this into cookie dough hummus
You can make this into cookie dough hummus but you don’t need to add any baking powder when making it into hummus. Check out my cookie dough hummus recipe for the best chocolate chip cookie dough hummus recipe.
How to make your own oat flour
Add quick oats, rolled oats or even steel cut oats to a high speed blender. Blend on high until the oats have been broken down into flour. You can store extra in the pantry in a well sealed container for up to 2 months.